I usually save the garage to decorate dead last. But I couldn’t hold off any longer. Just like the master suite, including the master bedroom, bathroom and closet which had been completed prior to the reveal here just a couple weeks ago, (You can read about them here: Bedroom, Bathroom, and Closet. I also finished the garage decor a while ago. What took me so long to post about it? Simply, I wanted it to be one of The Queen’s Quarters’ last reveals. I still have the laundry room and the backyard patio. The laundry room is somewhat “decorated”, just not altogether the way I would like and envision it. And I’m in no rush to complete the back patio because it’s cold now… well, cold for us here in Arizona. I won’t be looking to sit out there again until late February or early March, so we’ll just have to see what’s happening then.
As I stated, I really wanted to wait to start on my garage decor, but I quickly tired of driving into the plain, dingy space that was my after-move-in garage. And I had to make a decision fairly quickly if I was going to be doing my own epoxy floors. The temperatures have to be at a certain range or the process won’t take to the concrete. While I’d considered other garage floor options, diy epoxy was the most cost effective way to go. I won’t go through the whole flooring process in this post, but I went I did go into more detail on it in the garage makeover post for my last house, and you can read all about it HERE. Here’s a picture of the finished garage decor in the house I moved out of in March of 2019. I only got to enjoy it for 4 months.

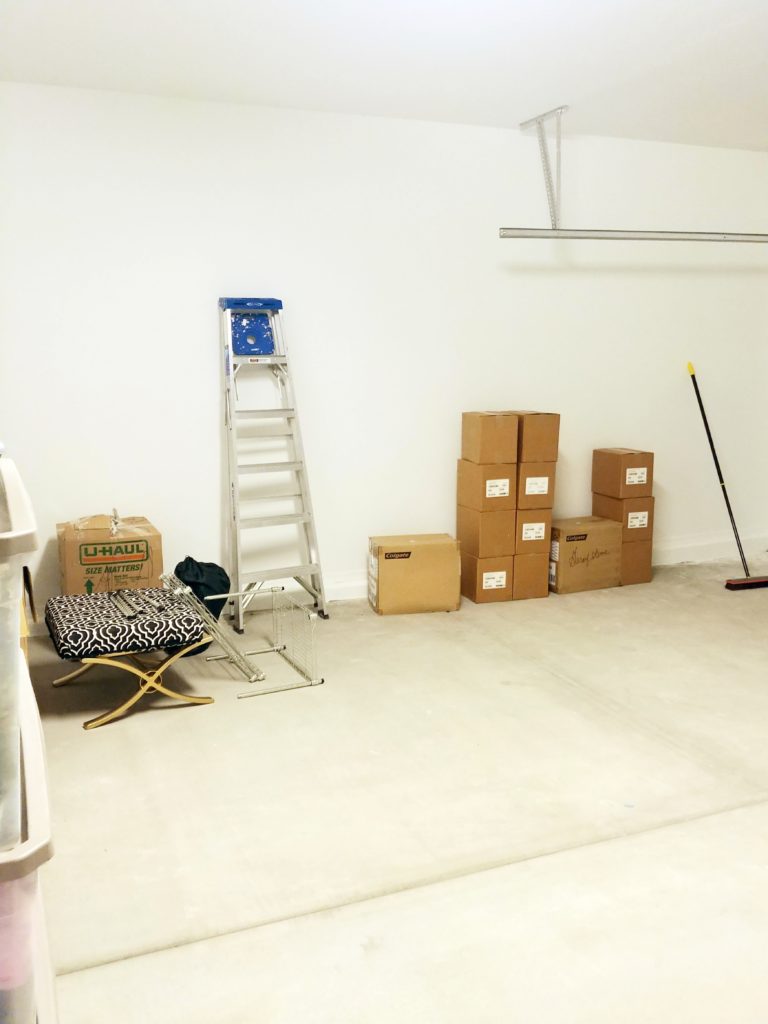
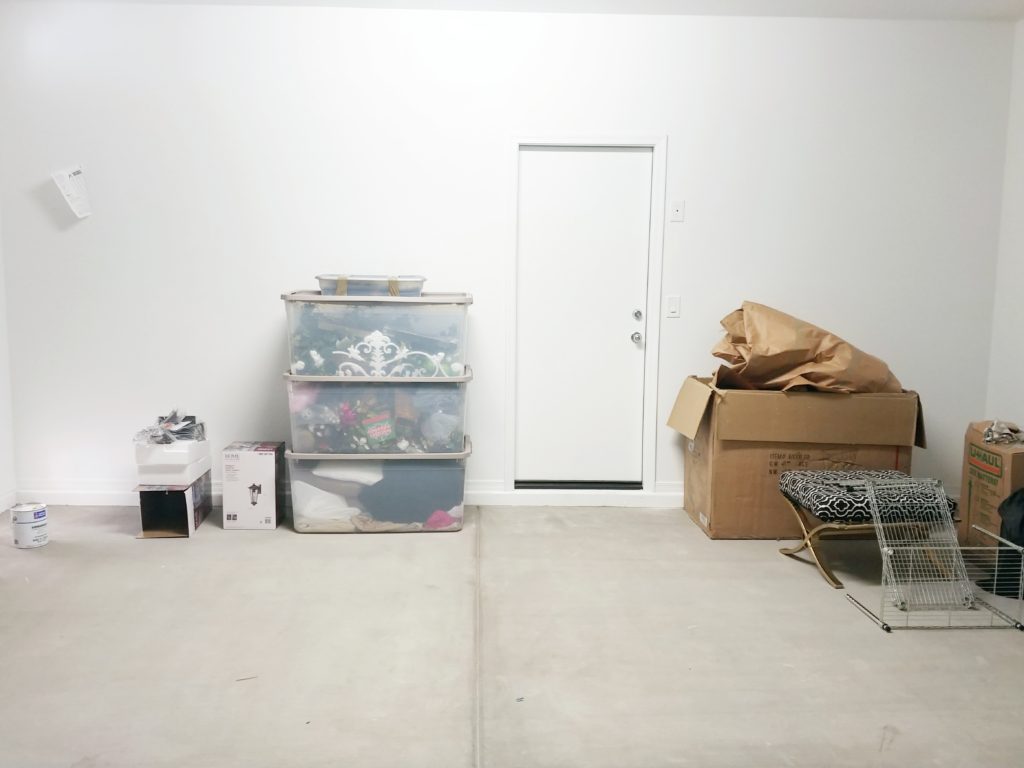
Now, many have asked me, “why in the world would you decorate a garage?” And here’s my answer… while I don’t really need a ton of storage in the garage, nor do I have the funds for the decked out version with custom cabinets and professional flooring, I have always felt that this was the first “room” of the house I saw when I came home, so when that door folds up, I want to be greeted by some kind of “pretty”. This is my third garage decor makeover. Here’s what my garage looked like after move-in…
Here’s a few pics of the epoxy paint going down on the concrete.

I did most of the work at night because the temperature was perfect at that time of day. Once the floor was done, it was time to add everything else in.

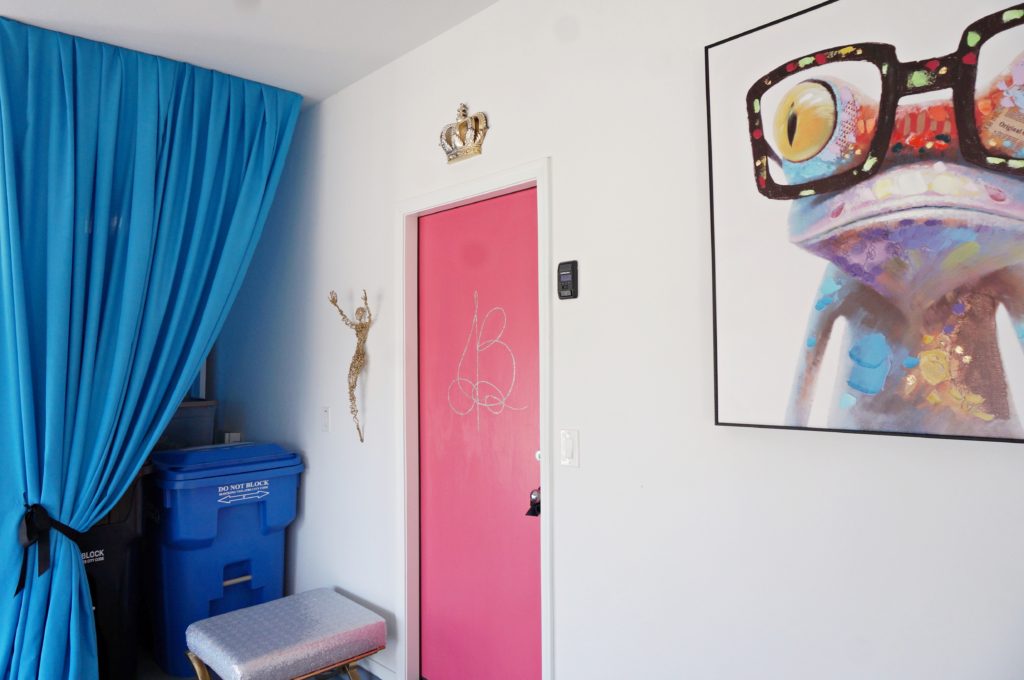
I didn’t do an inspiration board this time because there was only one element I used for the entire inspiration for this decor. I was headed in a totally different direction until I was gifted this adorable painting.

I always loved this painting that was left in one of my co-workers offices, before I also left to take another position. When I came back to visit and saw she hadn’t taken it, I reached out to her and she was so gracious to give it to me. Thank you Laura Beller Kirby. I am in love with it! So without further adue, here’s the final garage decor…


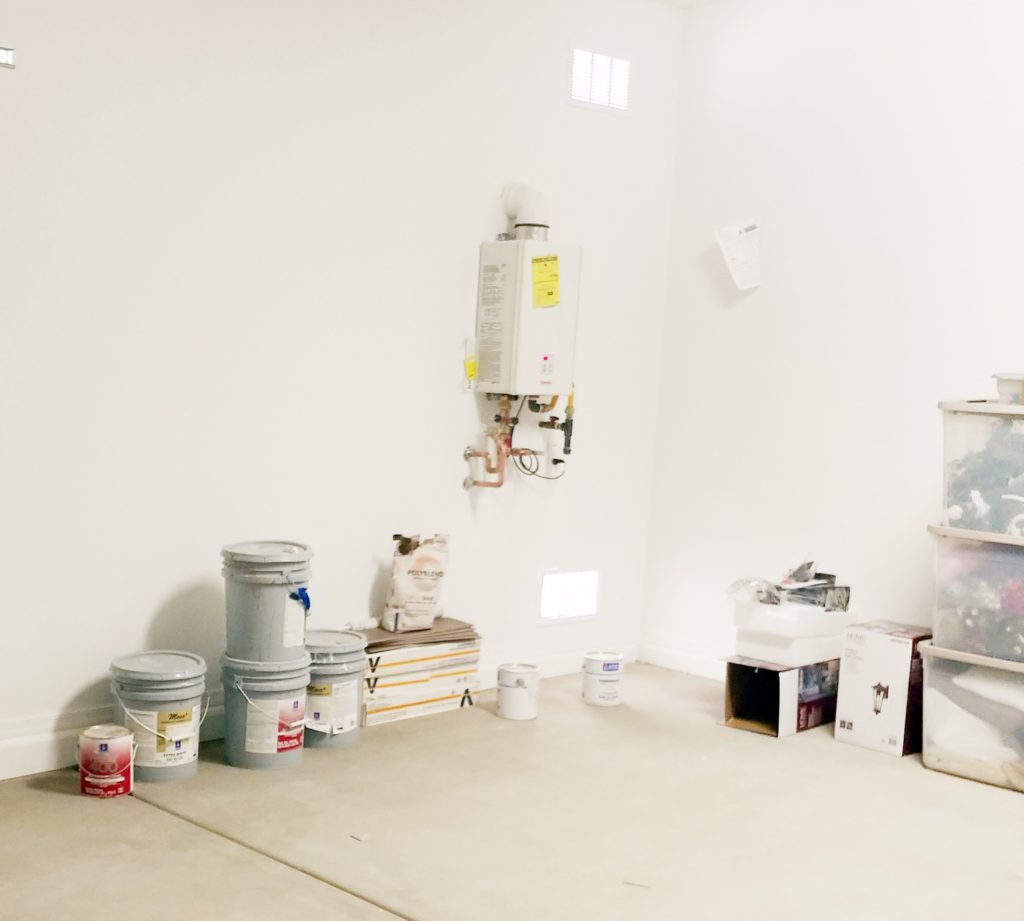
I tried to get custom cabinets and realized I couldn’t. I don’t like to see the water heater. Even though this is a tank-less water heater, and it’s considerably smaller, with cabinets there was no way for me to conceal it because of course, they won’t wrap the cabinets around it. Same thing with the two vents on that wall. So I was faced to source out other options.
I’m really happy with how it all turned out. The mirrors are from Walmart. The fabric is from SAS Fabrics. And epoxy flooring products were by Epoxy Seal from Lowe’s. I used Home Depot’s Behr products last time and considering some of the issues, I thought I’d try a different brand this time. So far so good, but I’ll keep you posted.


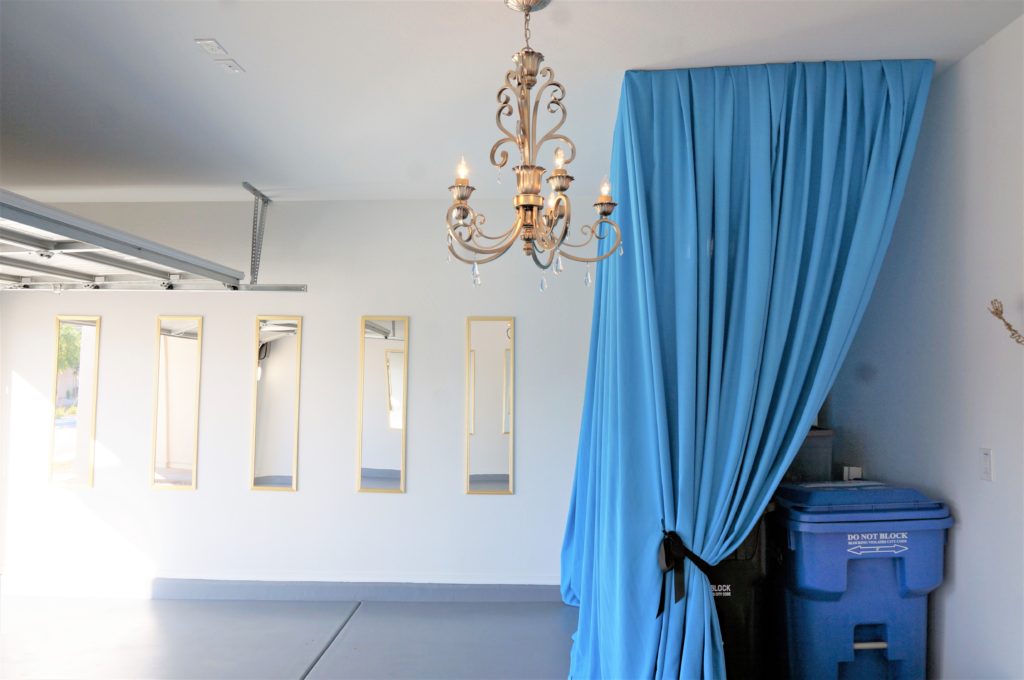
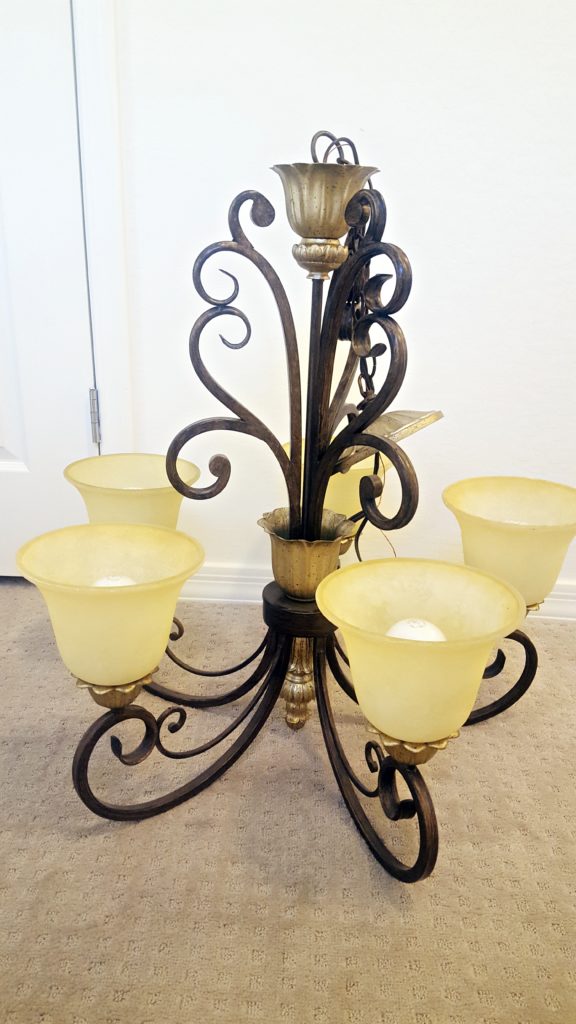
The chandelier, purchased from Home Depot many years ago, was also hung in my last garage, but before that, it was in the living rooms of my two homes prior to that one. As you can see, it’s been re-purposed a couple times. In fact, all the chandeliers in my home with the exception of two, were purchased from Home Depot. They are typically my “go-to” for all things Home Projects. I’m in there so much, and spend so much money there, I should be hired as some sort of spokesperson. Several of the associates actually know me by name, yikes!

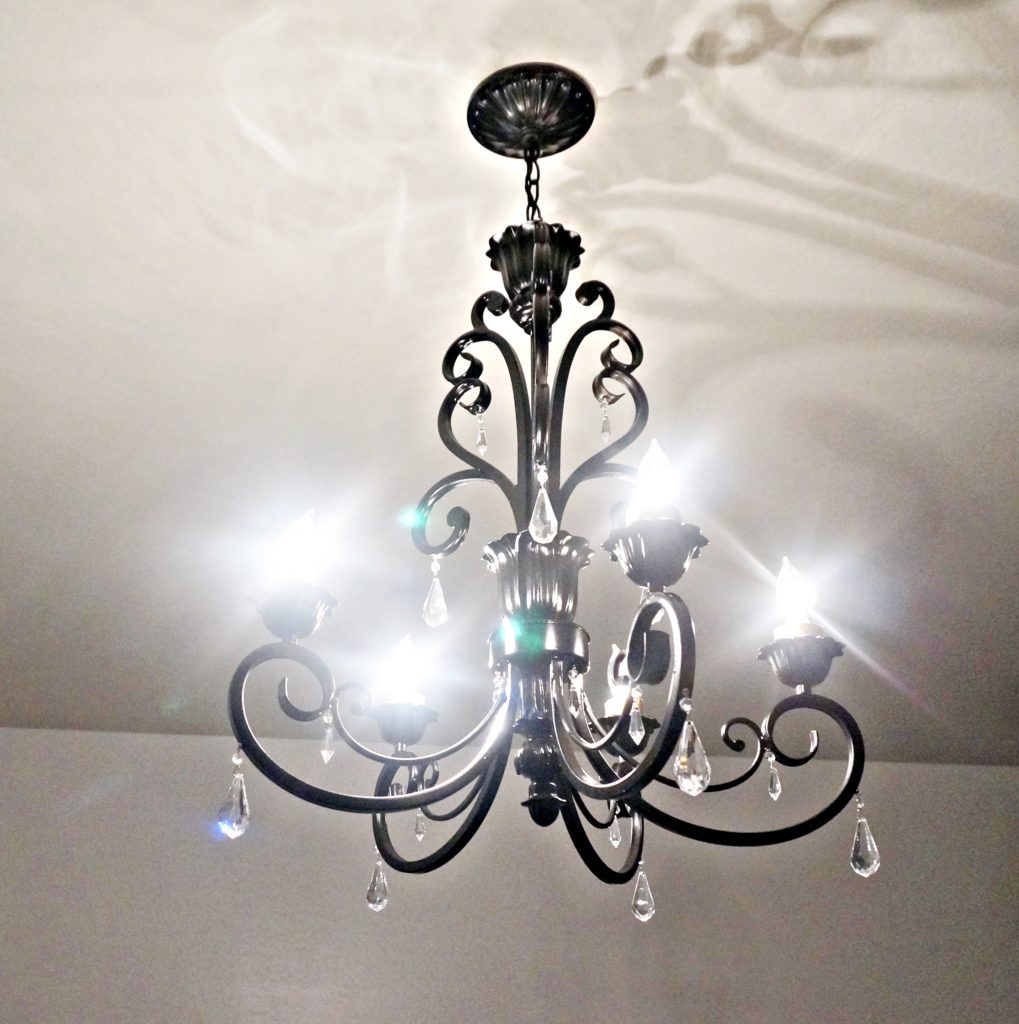
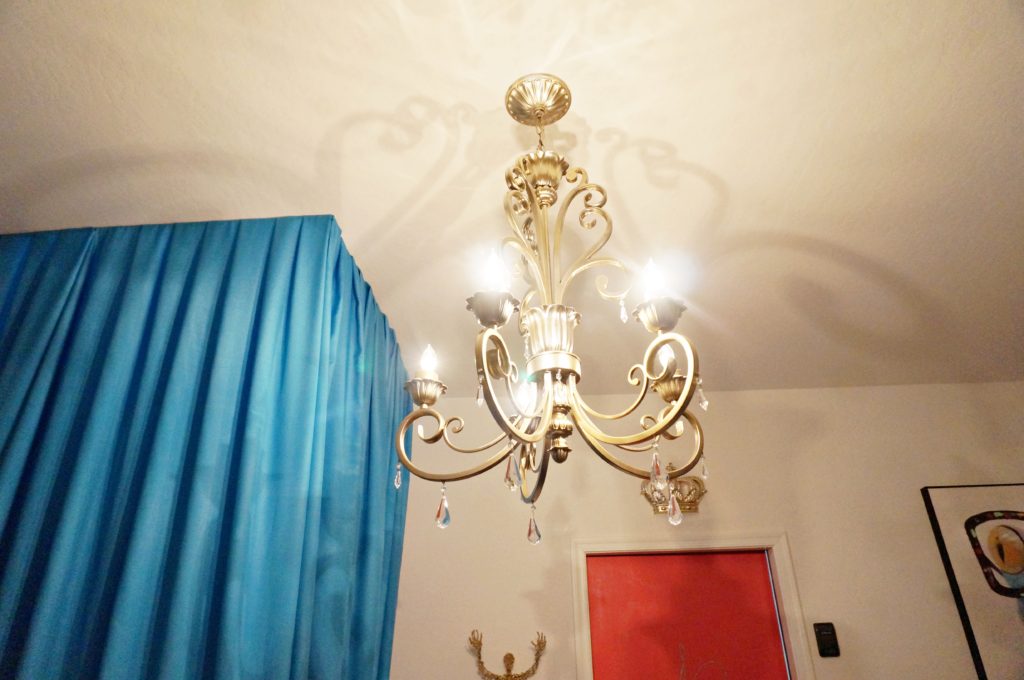
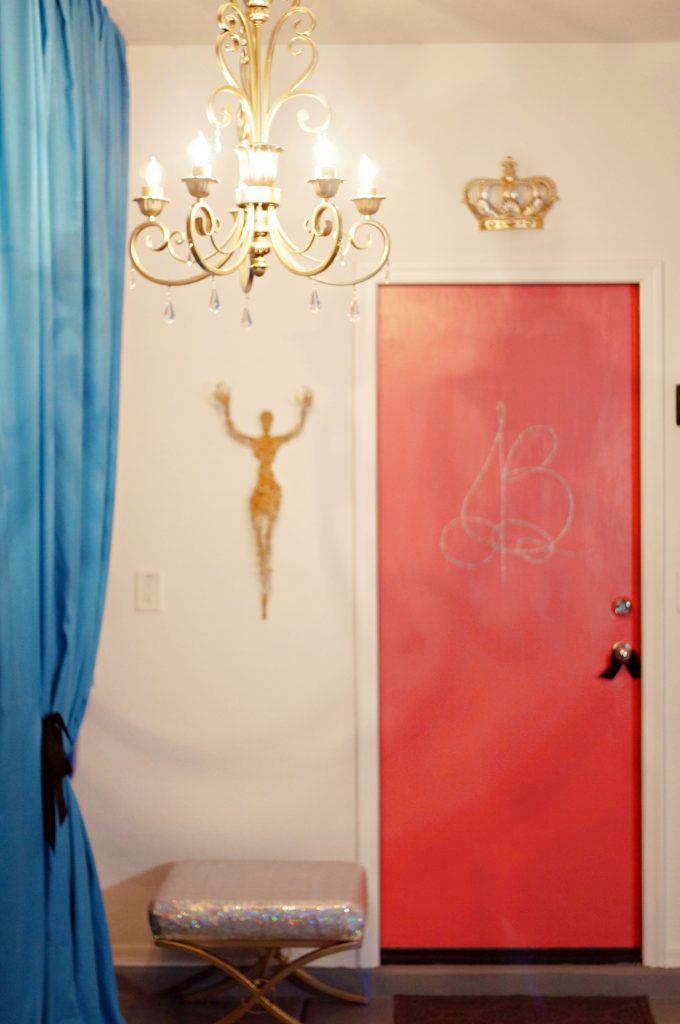
So… the typical garage door opener unit runs down the center of the space, hindering the view of any decorative light fixture that may hang from the ceiling. I knew I was going to have a side/wall-mount garage door opener from the very beginning of this home buying process. The builder didn’t offer it, so I did a little research, and found the LiftMaster 8500 Wall Mount Wi-Fi Garage Door Opener. After reading several reviews, I decided this was the way to go, and I purchased it from a third-party vendor via Home Depot.


My electrician spent a couple hours re-wiring in prep for the side mount installation. All-in-all, the cost for re-wiring and the side/wall mount unit itself, was actually cheaper than what the builder was charging for the center unit and it’s wiring. For me, this was money well-spent. It’s super quiet, compact, automatically dead bolts the door after it’s down, and I can operate it remotely. I still haven’t learned all the other bells and whistles on it though. One of my friends like it so much, she had one installed in her home! Unfortunately, the chandelier still sits a little ways back from the center because the builder refused to move it a couple feet forward. Eventually I’ll have it done, so on the “To Do” list it goes for now.

I was so happy I was able to successfully hang fabric from the ceiling to create a storage area for all my “garage-y” things, like: paint, tools, holiday, fabric and miscellaneous decor tubs, and even my trash and recycle receptacles.


And yes, that’s the same stool I used in my last garage; purchased from Craig’s List, only with different fabric. I love this multi-colored sparkle!


Of course there are always going to be some things I would like to have been able to do, but overall, I love the colorful and whimsical theme of this garage. It truly reflects how I’m feeling these days.

Now every time I come home, and the garage door goes up, I see a little bit of “pretty”, and it makes me smile. I’m so glad I got it done sooner rather than later :)xo

Hi Ingrid, Muchlove2U; it’s been a minute since I’ve responded but I do continue to read your posts. I have been inspired by your taste and flare, but I ‘m in absolute awe of the garage decor. You’ve got to have the happiest car in town!!! Your fantastic designs are indeed outstanding. You do personify Beauty and Class in so many ways. Please say hi to Aunt Pat for me, and Micheal too. Even more Grace & Peace to you always.
Hey Cousin Lawrence, and Happy New Year to you! Thank you so much for always supporting the blog, and for those lovely sentiments. They’re so appreciated. I will definitely pass along your greetings to Mom and Mike. Much love always :)xo
I love the vibrant colors!! Absolutely beautiful ❤
Hi Pamela, I’m so glad you like it! Thank you so much :)xo