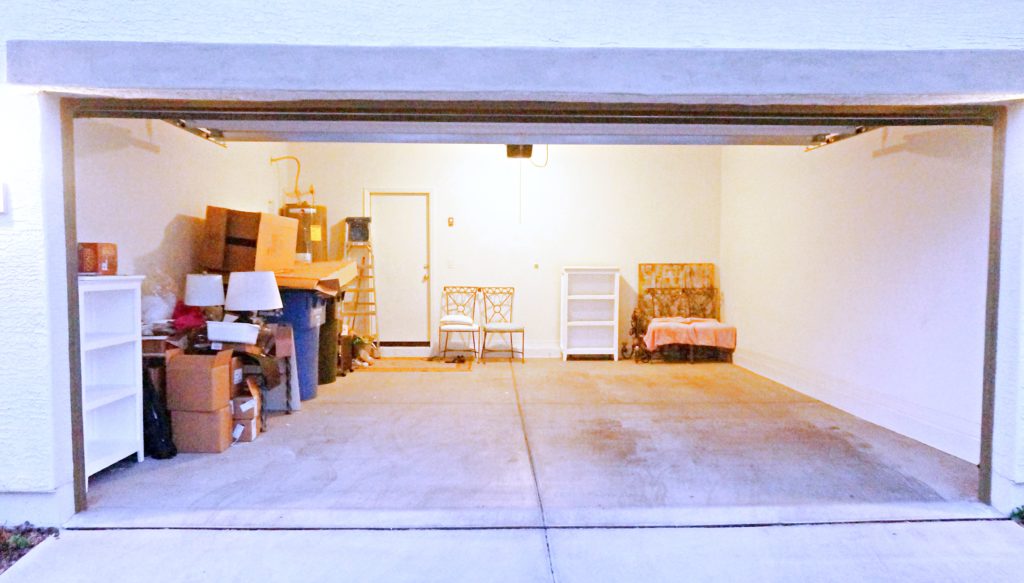
Back in October I posted the announcement that I was beginning my garage makeover. You can read that post HERE. I stated that while my goal was to complete it in 4 weeks, it would probably be closer to six. Well, it turned out to be eight. But right before Thanksgiving I went on a social media and blogging break that I ended on Christmas Day. So I posted about Christmas, and of course I had to post about the New Year. So here we are, finally! Here’s a reminder of what the garage looked like when I started.
I donated several items to Goodwill, and re-organized a couple storage areas inside the house for some things, all in an attempt to minimize what actually gets stored out there. I was determined to keep it only to tools, mops, brooms, ladder, paint and painting accessories, car detail products and that worn down pair of shoes I slip on when taking items to the trash, Ha! Now there were a couple reasons this project took a few extra weeks. One… I exercised my God-given female right to change my mind about the color palette. I was in Home Depot, about to have them mix the grey paint… remember the Mood Board?

And I changed my mind. I decided I didn’t really want a room in my house, even the garage, that didn’t fit my all-or-mostly-all-white decor theme. I didn’t want the garage to look so dramatically different from what was inside the door. So back to gazing at countless pictures online I went. I’d see one element and try to develop a plan from that, then another and I’d try to piece it together, all to no avail. I didn’t like anything I was coming up with. Nothing clicked. So I decided to start with what I absolutely knew for sure I wanted… the black floor, the black molding, the black chandelier, and the pink door. I finally ran across a couple photos (I can’t remember where so I can’t give them credit), and I knew instantly I’d found my new inspo items. Developing a palette from there was quick and easy. Here is the final mood board…

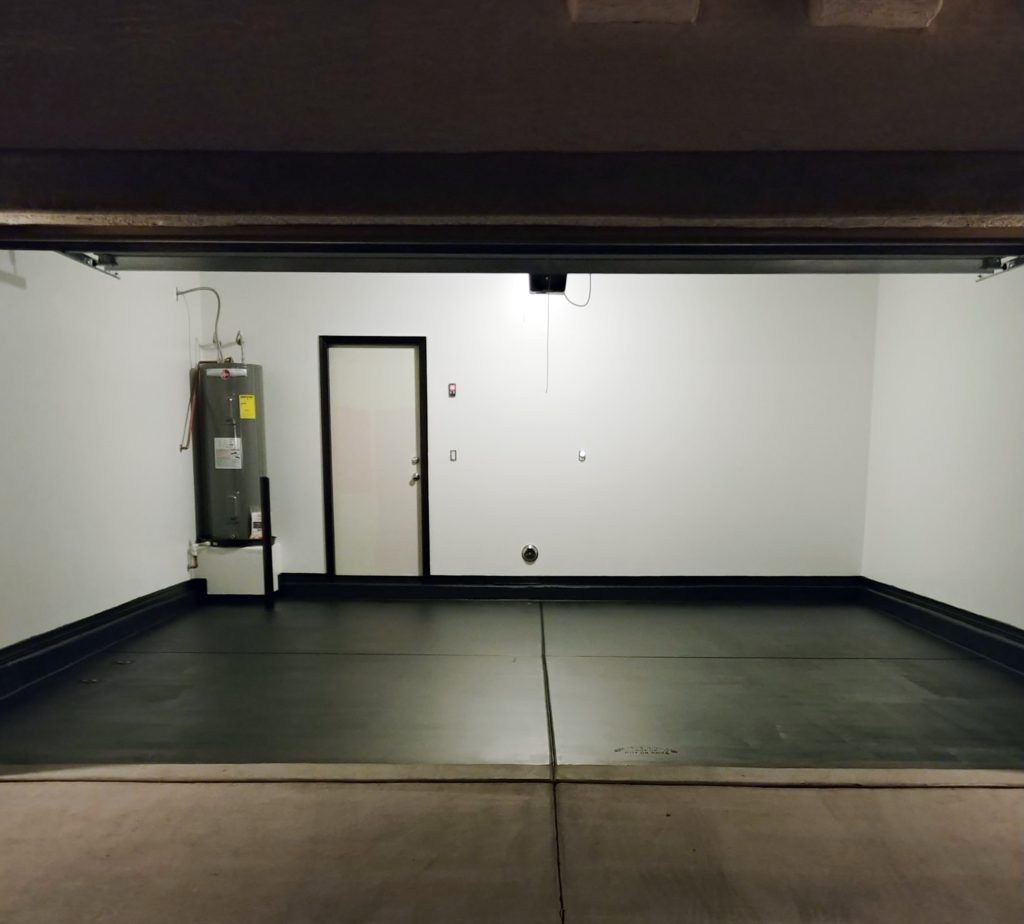
That pop of apple green, the gold in contrast to the white and black. I fell in love and ran with it. In keeping with the white-wall theme of the inside of my home, I painted the garage walls white too. I painted the trim and then moved on to the epoxy floor. Lord. Have. Mercy. This is reason number two, why it took me two extra weeks to complete this project. As you know, Arizona summers go on and on and on, well into the Fall. Temperature-wise that is. When applying epoxy, the application surface has to be between 50 and 80 degrees during the entire process, which has approximately seven parts requiring at least a week to ten days. The weather was perfect when I began the process. Not so much, half way through it, due to a sudden and significant drop in temperature. This is going to be a bit long, but stay with me as I try to “briefly” go through my process. First, there’s the cleaning/degreasing of the floor. I only had to clean my floor once since it’s a fairly newly built home and didn’t have any stains. Second, is the etching/acid wash that makes the concrete gritty and porous enough for the epoxy to adhere to. My floor required two acid washes before the concrete surface had the right texture to proceed. The waiting period before moving on at each of these steps is 24 hours. Now apparently, concrete holds moisture under the surface when the temperature is too cool that isn’t readily visible to the naked eye. This is key to the next steps in the process. Moving on to step three, after applying the second acid wash and waiting 24 hours, I applied the first coat of epoxy. 24 hours later, I applied the second coat of epoxy with glitter added. I wanted a little sparkle to the floor. The photo below is after the walls and trim were painted, and both coats of epoxy had been applied. Unfortunately you can only see the sparkle when the light hits it at certain angles, so they’re not visible in the photo.
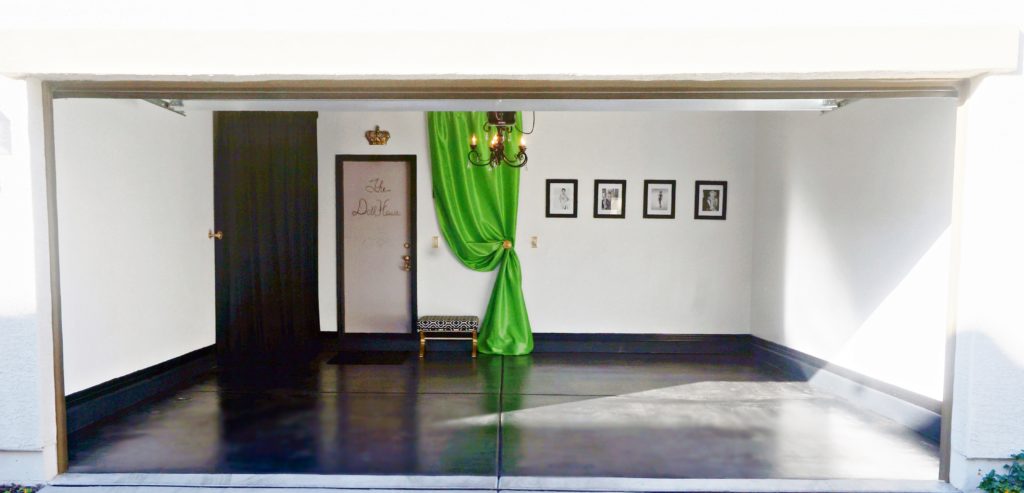
I was super excited to have one of those high-gloss black floors that I’d seen so much of lately, so the next step was to add the first coat of high gloss sealant. I followed the instructions to the T, and after, wait for it, wait for it… 24 hours, I went out to apply the second coat of sealant. Imagine my horror when I found several sheer, milky-like patches all over my beautifully epoxied floor! Immediately I bonded with Google to find answers, and most suggested that it could take up to 72 hours to settle and become clear. After monitoring the floor for 72 hours, it hadn’t cleared up, so I bonded once more with Google over the next couple days and found more horror stories than I could believe on this very same issue. The milky patches were permanent unless… I stripped the entire floor and started from scratch. All I could say to myself was: “the devil is a lie for real!” There was no way I was doing that which would require me to be on hands and knees with solvent and towel getting it all up by hand… I can’t even imagine. So anyway, I wound up calling the product’s customer support line and thank God, the woman on the other end heard my cry. As it turned out, my concrete was retaining moisture and she advised that I apply another coat of epoxy and then the sealant using a thinner application. My budget took a hit having to purchase all the epoxy paint and sealant again, but considering the alternative, I had to shake it off and keep it moving. So now, after adding what turned out to be, two more coats of epoxy, waiting 24 hours between each, the first coat of sealant, another 24 hour wait, I added the second and final coat of sealant. Whew! The recommended wait time before placing objects on the floor was 72 hours, and the recommended time to wait before driving on it was 7 days, and only with corrugated cardboard under the tires, or you risk having the paint come up. I decided to wait an extra 4 days just for good measure. Deep sigh… It literally took me 3 1/2 weeks to finally be able to move items back in, and park my car in my garage again. Here’s a “word to the wise” moment… in my research of all things concrete floor epoxy, I did find out that the high-gloss floors you see in videos are done with professional grade product that’s only sold to, well, professionals. What you purchase in the home improvement stores will never yield those kinds of results. Maybe it worked for some, but I’ve epoxied three garage floors with supposed “high-gloss” sealants, and none of them garnered the super-shiny results even after several coats. Deeper sigh… All things considered I am happy with how it turned out. The floor will have to be cleaned more often, but I’m okay with that. Oh and by the way, the fine print on the epoxy and sealant cans stated that it takes a total of 24 days to completely cure… WHAT?!?! I’ll keep you posted on any future incidents that may occur, but after waiting 7 days, into the garage my car went on cardboard! As I re-live these events here I am tired all over again! While I waited those 7 days of curing, I got to the actual fun part of making my garage over. So here is The Dollhouse garage makeover reveal…

I totally fell in love with that apple green fabric in my inspiration picture and had to have it. The little seat I purchased off Craigslist and re-purposed it. I totally forgot to take a “before” shot of it, but it didn’t look anything like this. I spray painted the base and re-upholstered the cushion.
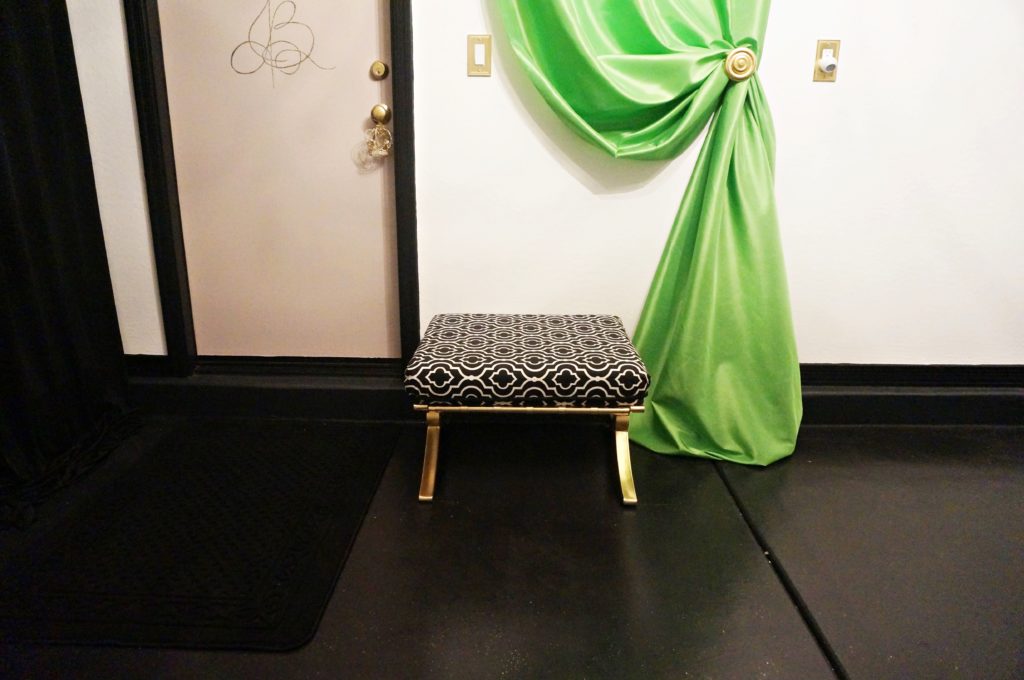
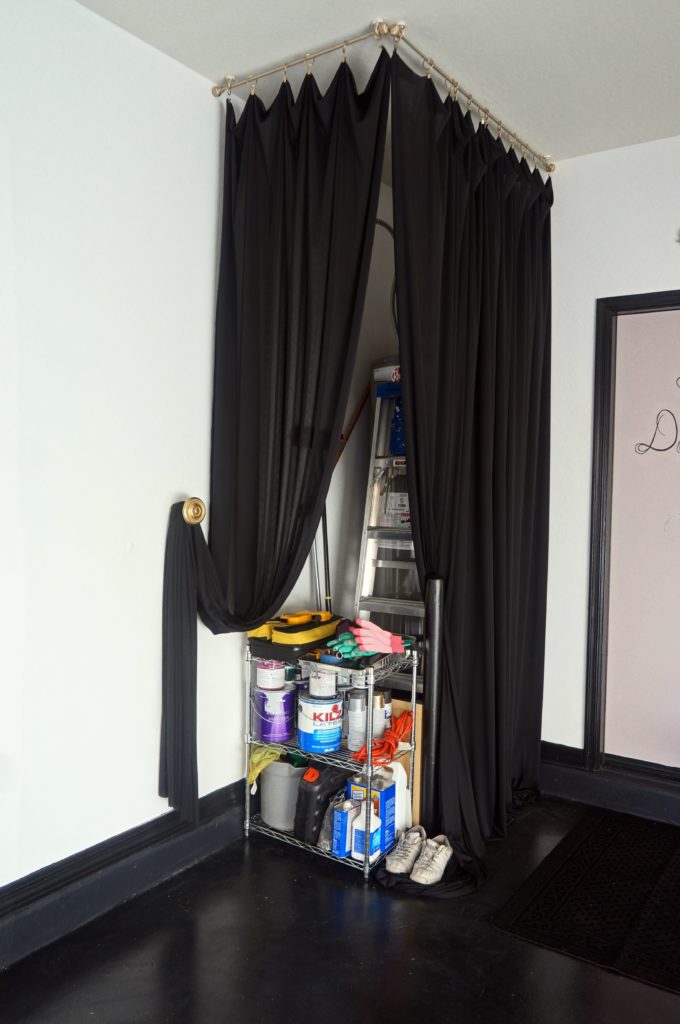
It’s just a little landing for my purse and any packages I may have as I’m entering the house, and I’m very happy with how it turned out. As I stated in the makeover announcement post, I absolutely, 100%, did NOT want to have to see the water heater and all my “garage-stored” things, so I had to get a little creative. I found some very inexpensive, lightweight, knit fabric to hang from the sealing, to make it look just a tad more elegant. Any time I need to pull out my ladder, or grab some touch up paint, I can just swoop the fabric to the side.
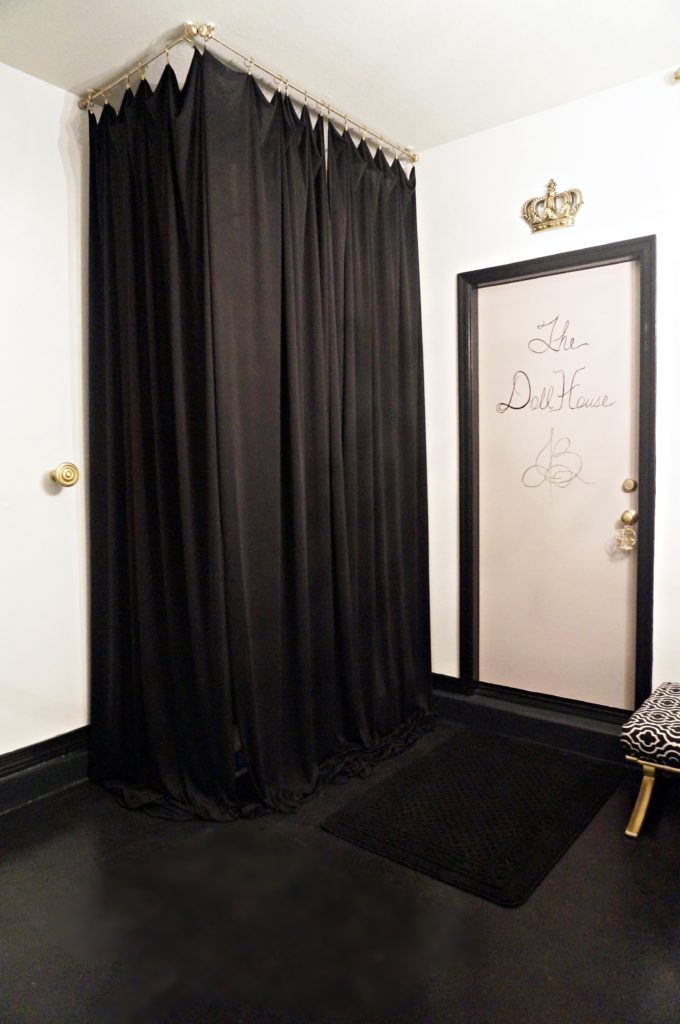
Adorning the door is my new favorite shade of pink, Behr’s Georgian Pink. I love it so much I’m trying to find someplace inside the house where I can use it. I added “The Dollhouse” and my insignia free-hand to the door. It’s nothing that can’t be covered with a little paint. I didn’t want a garage so girly, or so customed that it would be a re-sale deterrent in the future.


The ladies on the wall are the classic Hollywood Icons I admired so growing up. Dorothy Dandridge, Audrey Hepburn, Marilyn Monroe and Diahann Carroll. I dedicated an entire post to Ms. Carroll that you can read HERE.


I re-purposed the chandelier. Here’s what it looked like once upon a time…

I spray painted it with a black lacquer and touches of gold, (the gold you can’t see in the picture unfortunately), and I removed the glass shades.

After adding a rug, spray-painted gold curtain tie-backs, and changing the plastic builder-grade wall outlets to gold ones, I was done. Thank God!

Even with the floor issues and all the time it took, I can’t begin to tell you how giddy I get when I come home and the garage door goes up. I know the garage opener light comes on when you hit the remote, but sometimes, if I go out at night, I’ll leave the chandelier light on so it’s all lit up when the garage door goes up upon my return. I know, I’m a teenie weenie bit extra, haha! Ok, a lot extra, but I’m a firm believer in finding out what makes you happy and then going for it. Sometimes it’s just little things, like leaving the light on. Sometimes its a near month-long flooring ordeal, yikes! This is one “room” in the house that I can say with certainty, will not EVER be re-decorated.

Wow! I have NEVER in all my years seen such creativity and design in a garage. You are truly talented, skilled, and suppper creative. It’s quite sassy, sophisticated, and well orchestrated. I enjoy your taste! Extremely Fabulous
Great Work!
Awww, thank you so much Tracy for taking the time to read the post and to post such lovely comments. “Stop by” again some time, and all the best to you!
Hello Ingrid,
Your garage makeover looks fabulous!
Thank you Soneni! So glady you “stopped by” and checked it out :)xo
To bring beauty into the world in whatever form is to brighten the spirits of all who’s eyes are open wide enough to fully witness it. Thank you for this Ingrid for it has really brought joy to my day.
Thank you Eric! So glad you enjoyed it!
It is honestly very nice, especially when such a beautiful young Lady uses it for her car. It’s sweet and has made my ❤ heart 😃 smile 💕
Hi Dave, and thank you so much for taking the time to check out my blog post! I’m happy you enjoyed it!